
Setting Up DTF Print Files | Drop Of Colour
Setting Up Your DTF Print Files
Clean Artwork. Correct Sizing. Better DTF Prints.
A professional DTF print begins long before the artwork reaches the printer.
The quality of your final DTF transfer depends heavily on how the artwork file has been prepared.
Low-resolution images, unwanted backgrounds, incorrect dimensions and tiny details can all affect the final result. Some problems may look acceptable on a computer screen but become clearly visible after the transfer has been printed and pressed onto a garment.
This guide explains how to correctly set up your DTF print files before sending them to Drop Of Colour.
Why Correct File Setup Matters
A DTF printer reproduces the information contained inside your artwork file.
It cannot automatically correct:
- Blurry images
- Pixelated logos
- Incorrect colours
- White backgrounds
- Rough background removal
- Stretched artwork
- Incorrect print dimensions
- Missing design elements
- Very thin lines
- Unreadable small text
Preparing your artwork correctly helps to:
- Improve print quality
- Reduce delays
- Prevent unwanted backgrounds
- Keep print sizes accurate
- Improve fine details
- Reduce artwork preparation costs
- Prevent unnecessary reprints
- Speed up the ordering process
The better your artwork file is prepared, the more accurately it can be reproduced as a DTF transfer.
Recommended DTF Artwork Setup
Use the following as a general guide when setting up your DTF print files:
- Resolution: 300 DPI at the final print size
- Colour mode: CMYK is preferred where available
- Background: Transparent
- File direction: Normal and readable, not mirrored
- Preferred raster format: Transparent PNG
- Preferred vector formats: PDF, SVG, AI, EPS or CDR
- Artwork size: Set to the exact required print dimensions
- Gang sheet width: Maximum usable width of 550 mm
- Spacing: Leave at least 5 mm between simple designs
- Text: Convert fonts to outlines when supplying editable vector files
These settings are a practical starting point for preparing professional DTF artwork.
Step 1: Start With the Best Original Artwork
Always use the highest-quality original artwork available.
Do not use a screenshot when the original logo or design file exists.
Avoid using images copied from:
- Google Images
- Website thumbnails
- Email previews
- Screenshots
- Photographs of printed logos
Images shared through social media and messaging platforms are often compressed.
Compression reduces the number of pixels and removes fine detail. The artwork may still look acceptable on a phone screen but become blurry when enlarged for a garment print.
💡 Drop Of Colour Pro Tip: Ask your customer for the original artwork file before starting the job. The original designer may have a high-resolution PNG, PDF or vector version available.
Step 2: Set the Correct Print Size
Your artwork should be prepared at the size you want it to print.
Do not rely only on how large the design appears on your computer screen.
A design can appear large on screen while still being set to print at only a few centimetres wide.
Before preparing the file, decide where the transfer will be placed.
Common print positions include:
- Left chest
- Full front
- Full back
- Sleeve
- Neck label
- Leg
- Cap panel
- Tote bag
- Workwear branding
General DTF Print Size Guide
These sizes are general starting points only.
Small chest logo: Approximately 70 mm to 100 mm wide
Standard left-chest logo: Approximately 90 mm to 120 mm wide
Adult full-front print: Approximately 250 mm to 300 mm wide
Adult back print: Approximately 280 mm to 350 mm wide
Children’s front print: Approximately 160 mm to 230 mm wide
Sleeve print: Approximately 50 mm to 100 mm wide
Neck label: Approximately 40 mm to 70 mm wide
The correct size depends on:
- The garment size
- The artwork proportions
- The print position
- The amount of detail
- The customer’s preference
- The available garment area
💡 Drop Of Colour Pro Tip: Cut a piece of paper to the intended print size and place it on the garment. This gives you a better idea of how large the completed transfer will look.
Step 3: Use the Correct Resolution
For raster artwork, prepare the file at approximately 300 DPI at the final print size.
DPI means dots per inch. It describes the amount of image detail available for printing.
A design prepared at 300 DPI normally contains enough detail for a clean garment print when viewed at its intended size.
Why Final Print Size Matters
A small 300 DPI image may no longer remain 300 DPI after it has been enlarged.
For example, an image that is 100 mm wide at 300 DPI will lose effective resolution if it is enlarged to 300 mm wide.
The pixels are stretched over a larger area, which can cause:
- Blurry edges
- Pixelated text
- Rough outlines
- Loss of facial detail
- Jagged curves
- Poor small lettering
Increasing the DPI number without adding real image detail does not fix a low-resolution file.
The best solution is to use:
- The original high-resolution artwork
- A larger source image
- A vector version
- Professionally recreated artwork
Step 4: Understand Raster and Vector Artwork
DTF artwork generally falls into two categories:
- Raster artwork
- Vector artwork
Raster Artwork
Raster images are made from pixels.
Common raster formats include:
- PNG
- JPEG
- TIFF
- PSD
Raster files are suitable for:
- Photographs
- Digital paintings
- Detailed illustrations
- Textured artwork
- Designs containing complex shading
Raster artwork must have enough resolution at the final print size.
If it is enlarged too much, the pixels become visible.
Vector Artwork
Vector artwork is created using mathematical paths rather than fixed pixels.
Common vector formats include:
- SVG
- AI
- EPS
- CDR
- Vector PDF
Vector artwork is suitable for:
- Logos
- Text
- Line art
- Simple illustrations
- Geometric designs
- Business branding
Vector files can normally be resized without becoming pixelated.
However, a file saved as PDF or SVG is not automatically a true vector file. A low-resolution image can still be placed inside a PDF or SVG container.
Step 5: Remove the Background
DTF artwork should normally have a transparent background.
Every visible pixel in the file may become part of the final print.
If your artwork contains a white square or coloured background, that background may print together with the design.
This can create:
- White boxes around logos
- Coloured rectangles
- Rough borders
- Unwanted patches
- Large solid transfer areas
How to Check for Transparency
Open the artwork in a design program that displays transparent areas as a grey-and-white checkerboard.
You can also place the artwork temporarily over different coloured backgrounds.
Check it over:
- Black
- White
- Red
- Blue
- Bright green
This helps reveal:
- White leftover pixels
- Dark outlines
- Rough background removal
- Transparent shadows
- Hidden boxes
- Soft halos around the design
💡 Drop Of Colour Pro Tip: A white background and a transparent background can look identical on a white computer screen. Always check the file using a coloured layer behind the artwork.
Step 6: Clean the Artwork Edges
Automatic background-removal tools do not always create clean edges.
After removing the background, zoom in and inspect the entire design.
Look for:
- White outlines
- Rough edges
- Missing sections
- Transparent holes
- Fringing
- Leftover background pixels
- Soft unwanted shadows
- Parts of the design removed accidentally
Hair, fur, smoke, flames and transparent objects can be difficult to remove cleanly.
These types of artwork may require professional preparation rather than one-click background removal.
Step 7: Be Careful With Semi-Transparent Effects
DTF printing uses a white ink underbase behind the colour layer.
Semi-transparent artwork can behave differently once the white underbase has been added.
Effects that may produce unexpected results include:
- Soft drop shadows
- Outer glows
- Transparent smoke
- Faded edges
- Feathered background removal
- Low-opacity artwork
- Transparent gradients
- Light reflections
- Soft airbrush effects
A shadow that looks grey and transparent on your screen may print with a pale or white halo.
For the most predictable result, use clean edges and intentional solid transparency.
When transparent effects are important, order a test transfer before printing a large quantity.
Step 8: Check Small Text and Fine Lines
Very small text and extremely thin lines may not print clearly.
Artwork can look sharp while zoomed in on a large screen but become difficult to read at the final print size.
Pay special attention to:
- Care labels
- Contact details
- Social media handles
- Website addresses
- Small slogans
- Thin signatures
- Fine outlines
- Decorative script fonts
- Small distressed textures
Check the Artwork at Actual Size
View the artwork at approximately the physical size it will be printed.
Do not inspect small details only while zoomed in at 500% or 1000%.
Ask yourself:
- Can the text still be read?
- Are the lines thick enough?
- Are the spaces between letters still open?
- Are small details still visible?
- Will the design remain clear after pressing?
When text is too small, consider:
- Increasing the text size
- Using a heavier font
- Increasing line thickness
- Removing unnecessary detail
- Simplifying the design
Step 9: Keep the Artwork Proportions Correct
Do not stretch or distort the artwork while resizing it.
The width and height should remain linked.
Incorrect resizing can cause:
- Round logos to become oval
- Faces to appear too wide
- Text to look stretched
- Products to appear distorted
- Brand logos to lose their correct proportions
Resize the artwork from a corner or use the width and height controls with the aspect ratio locked.
Important: Stretched artwork cannot be corrected after it has been printed. The file must be fixed and printed again.
Step 10: Check the Colour Mode
Computer screens normally display colour using RGB.
Printers reproduce colour using ink, commonly through a CMYK-based process.
RGB Colour
RGB stands for:
- Red
- Green
- Blue
RGB colours are created using light.
Screens can display very bright colours that may not be reproducible using standard printing inks.
CMYK Colour
CMYK stands for:
- Cyan
- Magenta
- Yellow
- Black
CMYK is designed for physical printing.
Preparing artwork in CMYK can give you a more realistic indication of how certain colours may reproduce.
However, colours can still vary because of:
- Monitor brightness
- Screen calibration
- Ink profiles
- White underbase
- Garment colour
- Heat pressing
- Finishing sheets
- Fabric texture
Very bright neon, glowing, metallic and reflective screen colours cannot always be reproduced exactly with standard DTF ink.
For colour-critical company branding, order a test print before producing a full run.
Step 11: Use Solid Black Correctly
Black artwork can sometimes be created using a mixture of several CMYK colours.
This is known as rich black.
Rich black can work well in some types of printing, but very heavy ink combinations may not always be necessary for DTF artwork.
For small black text and fine linework, a cleaner black setup may produce sharper results.
When exact colour values are important, provide:
- The original brand guide
- CMYK values
- Pantone references
- A previous printed sample where available
Printed colour matching is always affected by the printing process, ink, film, garment and heat application.
Step 12: Convert Fonts to Outlines
When supplying editable vector files, convert your fonts to outlines or curves.
If the printer does not have the font installed, the software may replace it with a different font.
This can change:
- Letter shapes
- Spacing
- Line breaks
- Design proportions
- Logo appearance
Converting fonts to outlines changes the letters into vector shapes.
This prevents the font from being replaced.
Before converting fonts, save an editable copy of the original design in case the wording needs to be changed later.
Step 13: Remove Hidden and Unwanted Objects
Design files can contain objects that are not immediately visible.
These may include:
- Hidden layers
- White objects
- Clipping masks
- Old logo versions
- Unused text
- Objects outside the page
- Invisible rectangles
- Duplicate artwork
- Locked background layers
Before exporting the final file:
- Check all layers.
- Delete unused objects.
- Remove hidden backgrounds.
- Check outside the page area.
- Flatten unnecessary effects.
- Confirm that only the required design remains.
Hidden objects can increase the file size and may cause unexpected print results.
Step 14: Do Not Mirror the Artwork
Submit your DTF artwork in its normal, readable direction.
Do not mirror the design before sending it to Drop Of Colour.
Mirroring is normally required for cut heat transfer vinyl, but DTF printing uses a different production process.
If you mirror the artwork before submitting it, text and logos may print backwards on the garment.
Important: All wording should be readable normally when you open the final artwork file.
Step 15: Prepare White Artwork Carefully
White artwork can be difficult to see on a transparent or white computer background.
Before sending the file, place it over a dark temporary background.
This allows you to confirm that:
- The white design is present
- No sections are missing
- The edges are clean
- The background is transparent
- The artwork has not been accidentally deleted
- Small white text is readable
Remove the temporary background before exporting.
Do not send a white design on a permanent black rectangle unless the rectangle must be printed as part of the transfer.
Step 16: Check Distressed and Textured Artwork
Distressed designs contain small gaps and missing areas that create a worn or vintage appearance.
These small details can be difficult to print when they are too fine.
Check that the distressed sections are large enough to reproduce properly.
Very small transparent holes may:
- Close during printing
- Disappear after pressing
- Fill with white ink
- Create rough print edges
View the artwork at its final print size and simplify very fine texture where necessary.
Step 17: Prepare Photographs Correctly
Photographic DTF artwork should use a high-quality source image.
Avoid using:
- Small social media images
- Screenshots
- Images with heavy compression
- Dark underexposed photos
- Blurry photographs
- Images with important details cropped out
When removing a photographic background, pay close attention to:
- Hair
- Fur
- Clothing edges
- Fingers
- Smoke
- Fine objects
- Transparent materials
Photographs may also require adjustments to:
- Brightness
- Contrast
- Saturation
- Sharpness
- Shadows
- Highlights
- Skin tones
Always review the image at its intended print size.
Step 18: Set Up Individual DTF Transfers
When sending individual designs rather than a completed gang sheet, include the required print dimensions.
For each design, provide:
- File name
- Required width
- Required height where important
- Quantity
- Garment position
- Customer name where applicable
Use clear instructions such as:
Drop Of Colour logo — 100 mm wide — 10 copies
Back design — 300 mm wide — 5 copies
Neck label — 50 mm wide — 25 copies
Do not use instructions such as:
- Small
- Medium
- Normal size
- Same as last time
- About this big
- Standard chest size
Exact dimensions help prevent misunderstandings.
Step 19: Set Up a DTF Gang Sheet
A DTF gang sheet combines multiple designs onto one continuous sheet.
Drop Of Colour uses a maximum usable DTF printing width of approximately 550 mm.
Your artwork must remain inside this printable width.
Gang Sheet Preparation Tips
- Place the largest designs first.
- Add medium-sized artwork next.
- Use small logos and neck labels to fill suitable gaps.
- Leave at least 5 mm between simple designs.
- Leave more space around complicated shapes.
- Make sure no designs overlap.
- Keep all artwork inside the printable area.
- Check every design size.
- Confirm all quantities.
- Remove unused empty space where possible.
A well-prepared gang sheet should balance:
- Efficient use of film
- Correct print sizes
- Enough cutting space
- Clear artwork
- Easy sorting
Step 20: Name Your Files Clearly
Clear file names help prevent mistakes.
Avoid file names such as:
- image1.png
- final.png
- final-final.png
- newlogo2.png
- screenshot123.png
Use descriptive file names such as:
- Drop-Of-Colour-Left-Chest-100mm.png
- Drop-Of-Colour-Back-300mm.png
- Customer-Name-Sleeve-80mm.png
- Neck-Label-50mm.png
- Event-Shirt-Front-250mm.png
Include the size in the file name when possible.
This makes it easier to confirm the correct artwork before printing.
Step 21: Export the File Correctly
The correct export settings depend on the design software and file type.
Transparent PNG
A transparent PNG is suitable for many DTF designs.
Before exporting:
- Confirm the background is transparent.
- Set the artwork to the correct print size.
- Use high resolution.
- Keep the full design inside the document.
- Do not add unnecessary empty space.
- Check that the file is not mirrored.
PDF can be suitable for vector logos and professionally prepared artwork.
Before exporting:
- Embed or outline fonts.
- Keep vector objects intact.
- Remove unnecessary page backgrounds.
- Check transparency.
- Confirm the page size.
- Make sure the file contains the final artwork only.
SVG, AI, EPS and CDR
Editable vector formats are useful for logos, text and line art.
Before sending:
- Convert fonts to outlines.
- Remove hidden layers.
- Embed linked images.
- Expand important effects where necessary.
- Check clipping masks.
- Confirm the colour setup.
- Include a reference PNG or PDF when possible.
Step 22: Open and Inspect the Exported File
Always open the exported file before sending it.
Do not assume that the export was successful because the design looked correct inside the editing program.
Check the exported file for:
- Missing artwork
- White backgrounds
- Incorrect dimensions
- Blurry images
- Cropped edges
- Changed fonts
- Missing transparency
- Unexpected colours
- Hidden objects
- Incorrect direction
- Export errors
Zoom in and check the edges of the design.
Then view the complete file at normal size.
Step 23: Keep a Final Approved Copy
Save a final approved version of every artwork file.
Do not continue editing the same file after it has been approved and sent for printing.
A useful file structure may include:
- Original artwork
- Editable working file
- Customer proof
- Final print file
- Completed gang sheet
- Order information
Keeping organised records makes repeat orders faster and reduces the risk of using the wrong version.
Common DTF File Setup Problems
The Artwork Prints Blurry
Likely cause: A low-resolution image was enlarged.
Solution: Use the original high-resolution artwork or have the design professionally recreated.
A White Box Prints Around the Design
Likely cause: The artwork background was not transparent.
Solution: Remove the background and export the design as a transparent file.
The Logo Looks Stretched
Likely cause: The aspect ratio was not locked while resizing.
Solution: Return to the original artwork and resize it proportionally.
Text Prints in the Wrong Font
Likely cause: The font was not embedded or converted to outlines.
Solution: Convert the text to outlines before exporting the vector file.
Small Text Is Unreadable
Likely cause: The text is too small or too thin at the final print size.
Solution: Increase the text size, use a heavier font or simplify the design.
A White Outline Appears Around the Artwork
Likely cause: Rough background removal or semi-transparent pixels.
Solution: Clean the artwork edges and remove unwanted transparent pixels.
The Design Prints Backwards
Likely cause: The artwork was mirrored before being submitted.
Solution: Send the file in its normal readable direction.
Colours Look Different From the Screen
Likely cause: RGB screen colour, display settings or printing limitations.
Solution: Prepare the artwork in CMYK where possible and order a test for colour-critical designs.
Parts of the Design Are Missing
Likely cause: Artwork was cropped, hidden or removed during background editing.
Solution: Inspect the complete design and compare it with the original artwork.
The Gang Sheet Is Difficult to Cut
Likely cause: The designs were placed too close together.
Solution: Leave at least 5 mm between simple designs and more around irregular artwork.
Final DTF Print File Checklist
Before sending your artwork to Drop Of Colour, confirm that:
- You are using the best original artwork available
- The design is set to the correct print size
- Raster artwork is approximately 300 DPI at final size
- The background is transparent
- The artwork edges are clean
- No white boxes or unwanted backgrounds remain
- The design is not stretched
- Text remains readable at final size
- Thin lines are thick enough to print
- Soft shadows and transparent effects have been checked
- White artwork has been checked over a dark background
- Fonts have been converted to outlines where required
- Hidden layers and unused objects have been removed
- The artwork is not mirrored
- Colours have been checked
- The correct quantities have been confirmed
- Gang sheet designs have enough cutting space
- All artwork remains inside the 550 mm printable width
- The exported file has been opened and inspected
- The final approved file has been saved
Frequently Asked Questions
What is the best file format for DTF printing?
A high-resolution transparent PNG is suitable for many designs. Vector formats such as PDF, SVG, AI, EPS or CDR are often better for logos, text and line artwork.
What resolution should my DTF artwork be?
Raster artwork should generally be prepared at approximately 300 DPI at the final print size.
Does my artwork need a transparent background?
Yes, unless the background is intentionally part of the design. Any visible background may print as part of the transfer.
Should I mirror my DTF artwork?
No. Submit the artwork in its normal readable direction unless Drop Of Colour specifically instructs you otherwise.
Should I use RGB or CMYK?
CMYK is preferred where available because it is intended for print. However, the final colour can still be affected by the printer, ink, garment and heat press.
Can Drop Of Colour fix my artwork?
We can assist with identifying common artwork problems. Background removal, resizing, recreation and more complicated design work may require an additional artwork fee.
Can I send a JPEG file?
A JPEG can be used in certain cases, but it does not support transparency and may contain compression. A high-resolution transparent PNG is usually more suitable.
Can I use artwork from WhatsApp?
WhatsApp often compresses images. Request the original artwork file whenever possible.
Can I send a Canva file?
You can export your Canva design as a high-quality transparent PNG or suitable PDF. Always inspect the exported file before submitting it.
What width should my DTF gang sheet be?
Drop Of Colour uses a maximum usable DTF printing width of approximately 550 mm.
How much space should I leave between designs?
Leave at least 5 mm between simple designs as a practical starting point. Leave more space around detailed or irregular artwork.
Can low-resolution artwork be improved?
Small improvements may be possible, but missing image detail cannot always be restored. The best solution is usually to obtain the original high-resolution file or recreate the artwork.
Better Files Create Better DTF Prints
Good DTF printing begins with correctly prepared artwork.
Taking a few extra minutes to check your resolution, print size, transparency, text and export settings can prevent delays and unnecessary reprints.
The most important things to remember are:
- Use high-quality original artwork
- Set the correct physical print size
- Use a transparent background
- Keep the design proportions locked
- Check small details at actual size
- Do not mirror the artwork
- Inspect the exported file before sending it
When your files are prepared correctly, Drop Of Colour can reproduce your artwork more accurately and efficiently.
Ready to Print Your Artwork?
Send us your artwork, required print dimensions and quantities, and our team will assist you with professional DTF printing, gang sheet preparation and nationwide delivery.
Email: orders@dropofcolour.co.za
Phone and WhatsApp: +27 63 684 6086
Website: www.dropofcolour.co.za
Delivery: Available throughout South Africa
Drop Of Colour — helping you change the world one drop of colour at a time.
SEO Settings
Focus Keyphrase
Setting up DTF print files
Secondary Keyphrases
- How to prepare artwork for DTF printing
- DTF artwork setup
- DTF print file requirements
- DTF file format
- DTF artwork preparation
- DTF printing Cape Town
- DTF printing Johannesburg
- DTF printing South Africa
SEO Title
Setting Up DTF Print Files | Drop Of Colour
URL Slug
setting-up-dtf-print-files
Meta Description
Learn how to set up DTF print files correctly using the right resolution, size, transparent background, colour mode, file format and export settings.
Blog Excerpt
Learn how to prepare professional DTF print files with the correct resolution, dimensions, transparent background, colours and export settings before sending your artwork for printing.
Suggested Category
DTF Printing Academy
Optimised Tags
DTF artwork preparation, DTF print files, DTF file requirements, transparent PNG, DTF printing South Africa, custom DTF transfers
Image Alt Text
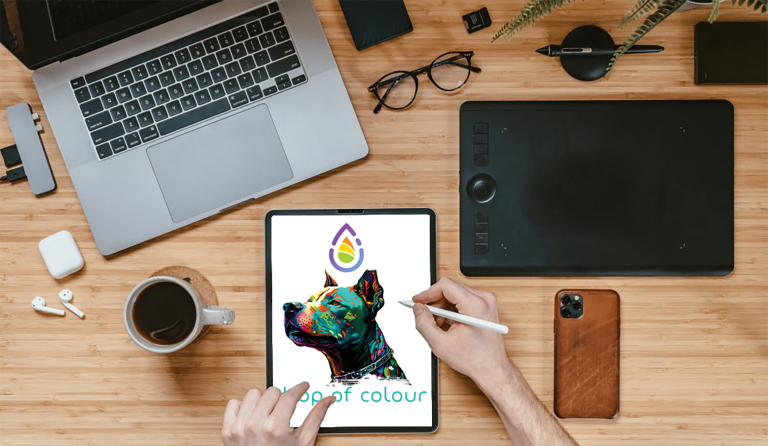
Preparing high-resolution transparent artwork files for professional DTF printing
Image Title
Setting Up Your DTF Print Files